HO1-a : Setup of the environment
Structure
This tutorial is structured as follow :
Requirements
This tutorial is mainly designed for computer running on Windows
Install Unity Hub
You can download Unity3D through the Unity Hub available here : Unity3D download webpage.
During the installation you may be asked to install Visual Studio.
Install Unity
In this tutorial we will use Unity 2020.2.2f1.
Warning : Changing Unity3D’s version can easily break a project thus you should keep the same version during the whole project.
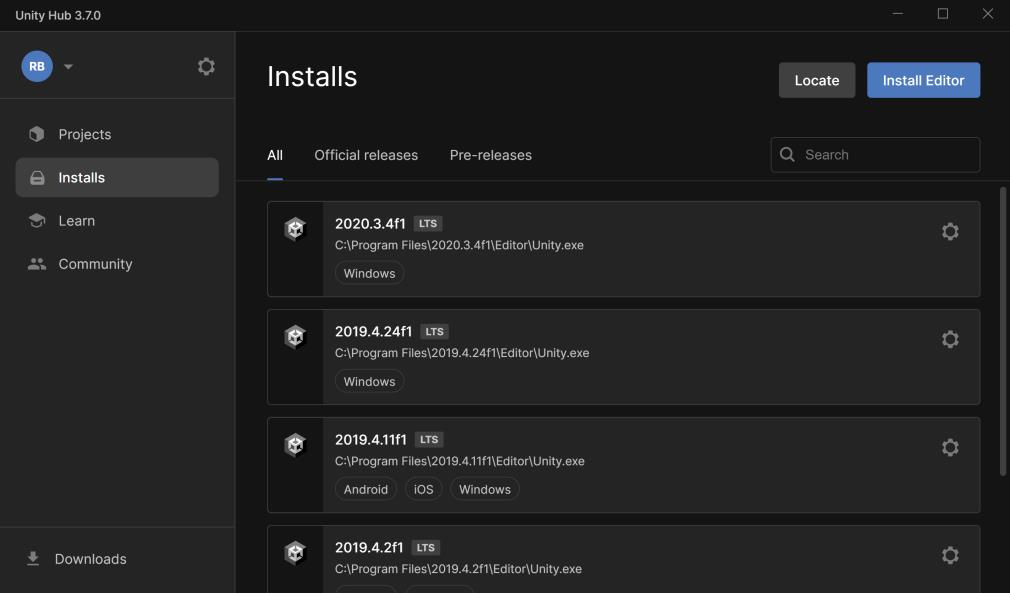
Within the Unity Hub, select the Installs section on the left an then click the Install Editor button:
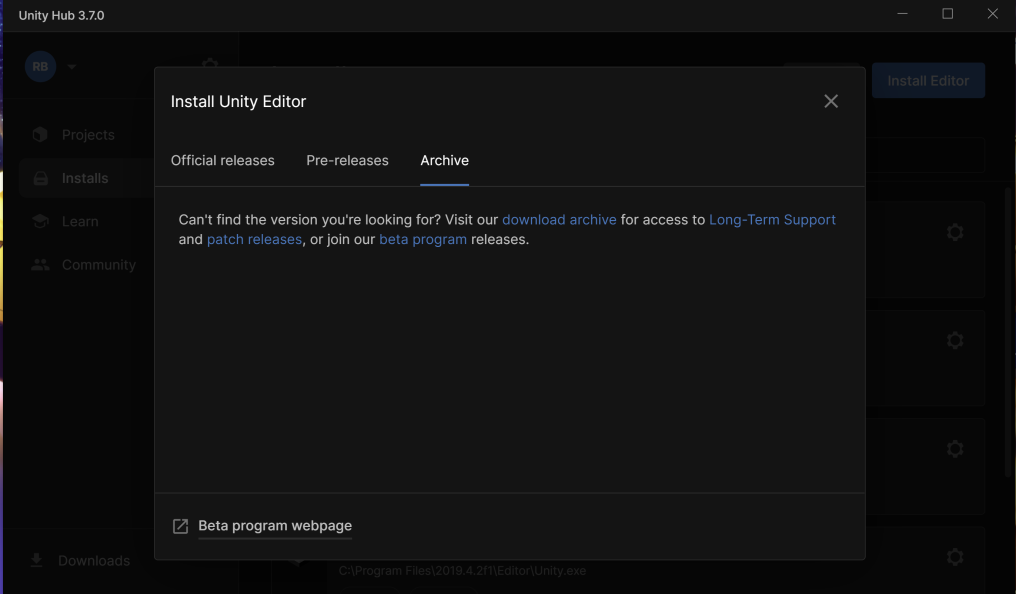
In the Archive section click on download archive:
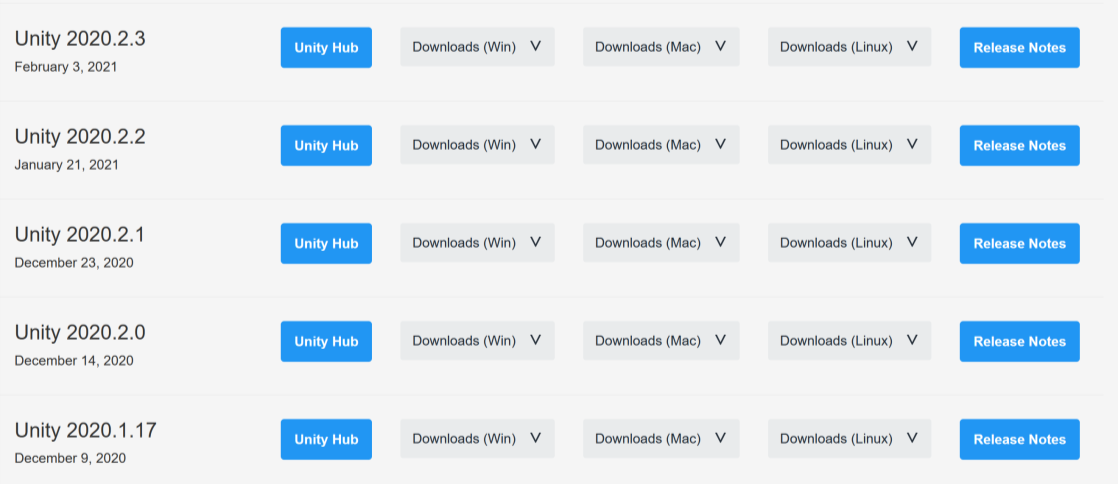
The archive website will be opened in your browser. Find Unity 2020.2.2 and click on Unity Hub:
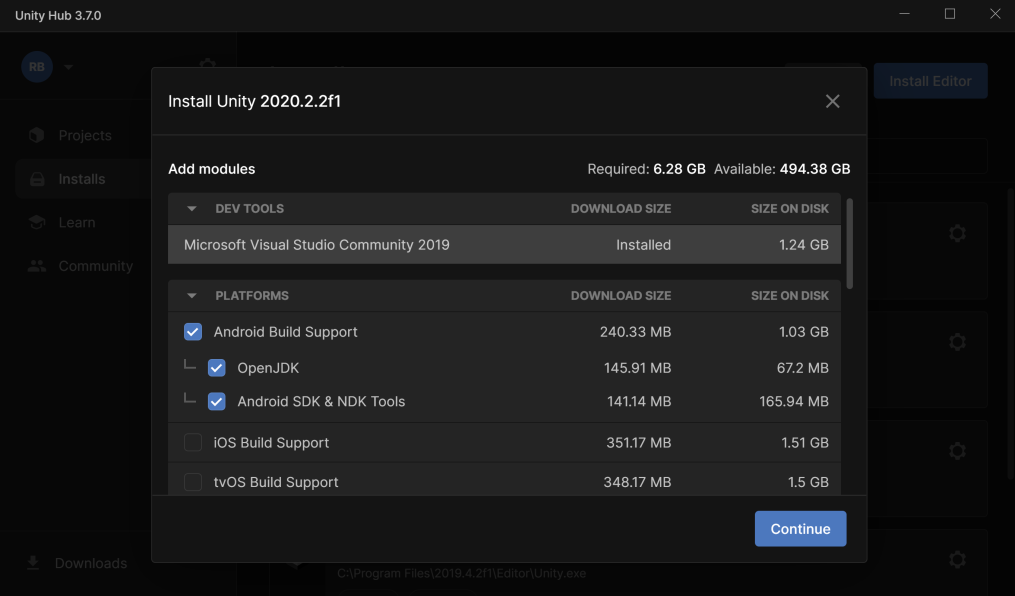
The download options will open in the Unity Hub.
Important : Add the Android Build Support required to build project for the Oculus Quest / OculuS Quest 2:
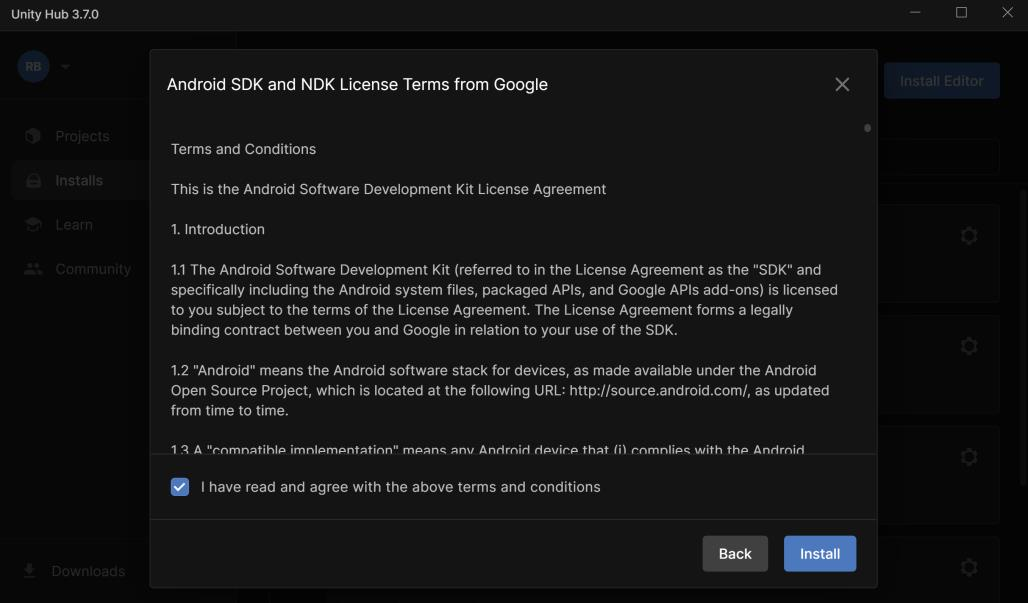
Finally accept the terms and conditions of usem, and click on Install:
Congratulations, Unity3D is now installed.
Install Android Debug Bridge
In order to push or debug your game on the Oculus Quest you need to install the Android Debug Bridge : adb.
Install binaries
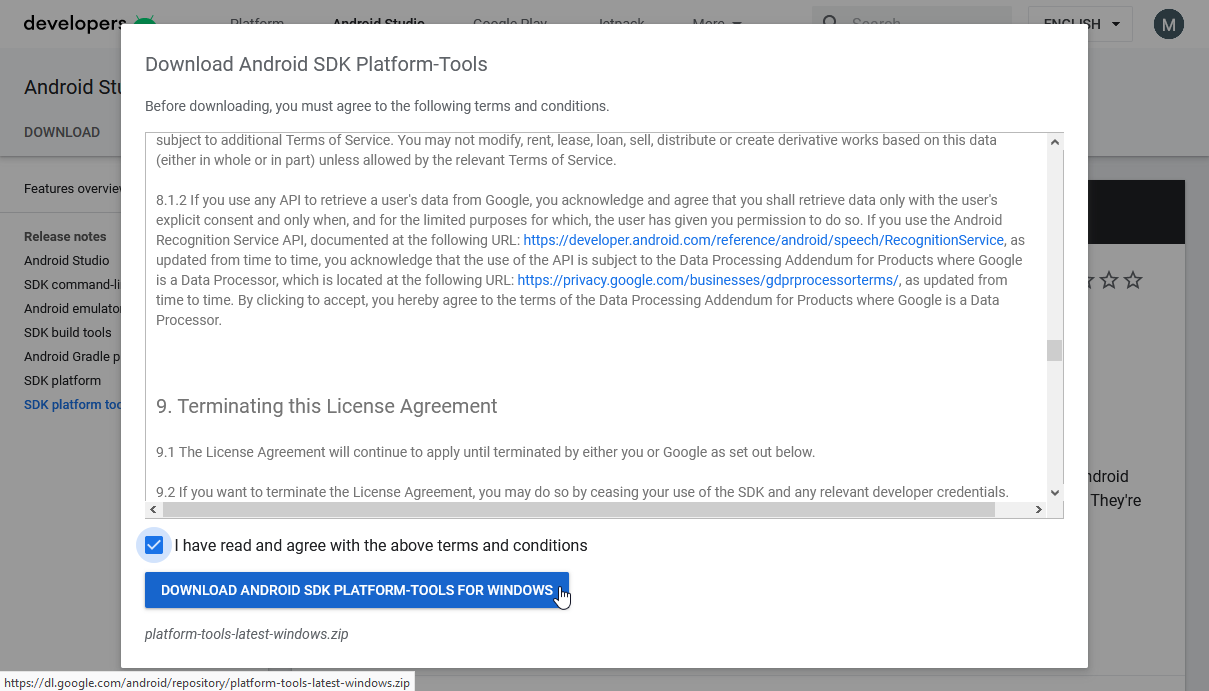
This program is detailed here and can be downloaded using this link : ADB Download Page
Select the version for your operating system in the list and accept the license
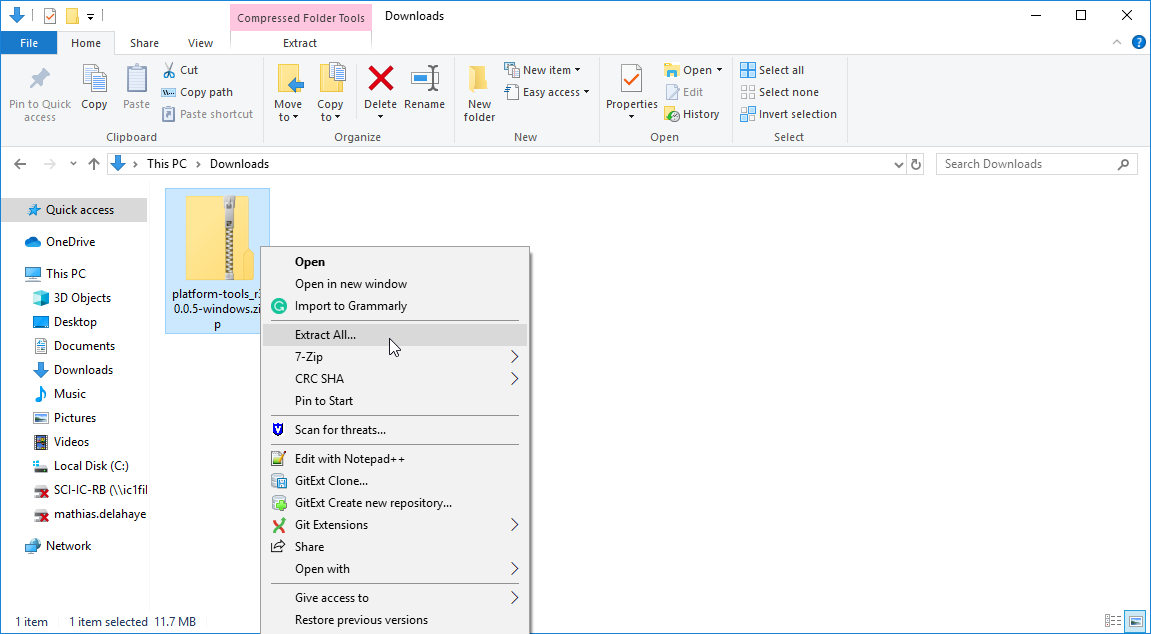
Once you downloaded the archive containing binaries and lib for Windows open the download folder and extract the archive to C:\Program Files :
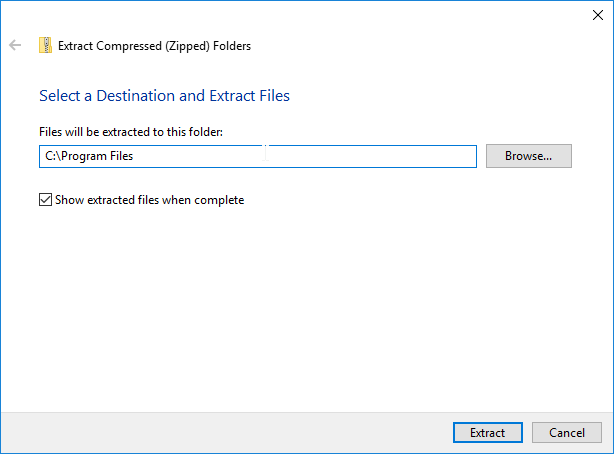
Specify the destination :
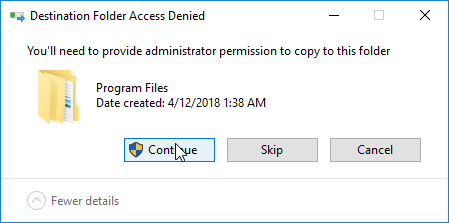
As you are about to install adb in a protected folder you must grant right for the copy :
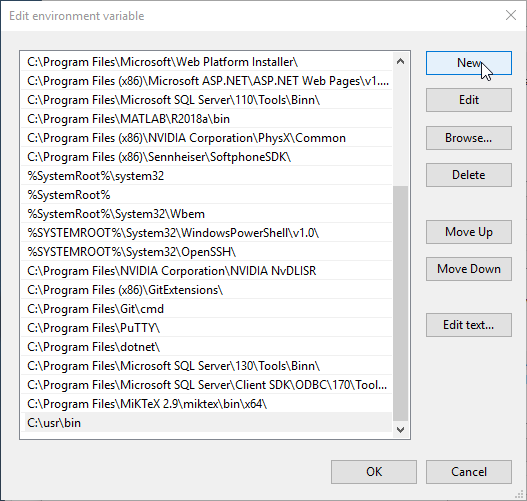
Edit the $PATH
Once adb installed in C:\Program Files\platform-tools you must add this repository in the $PATH to allow the shell or other programs to locate it automatically.
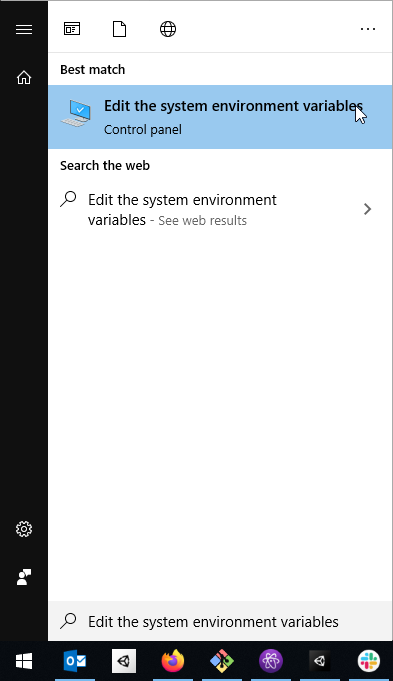
This can be achieve by searching for Edit the system environment variables in the search bar of Windows :
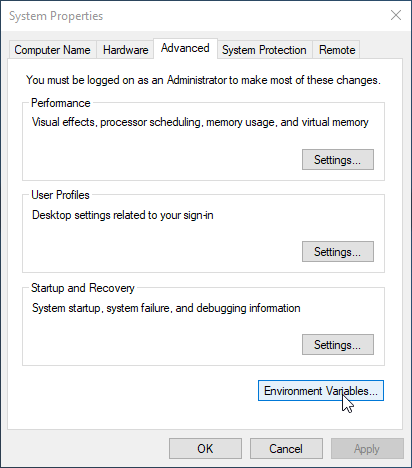
Then click on Environment Variables… :
Find and select in the list of System variables the line containing Path and click on Edit… :
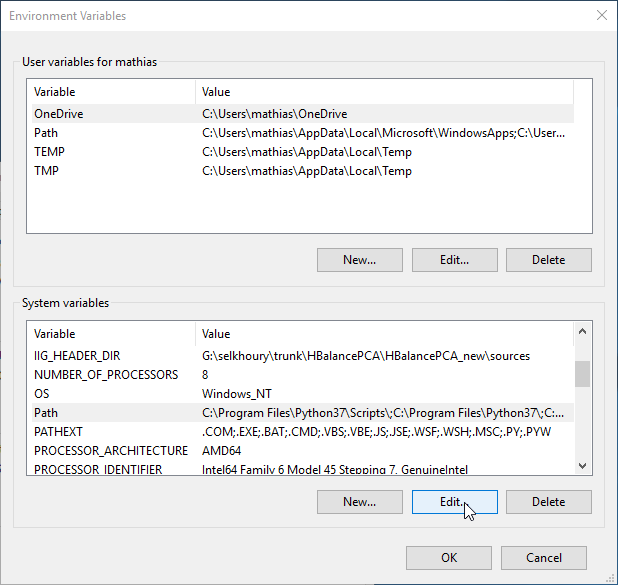
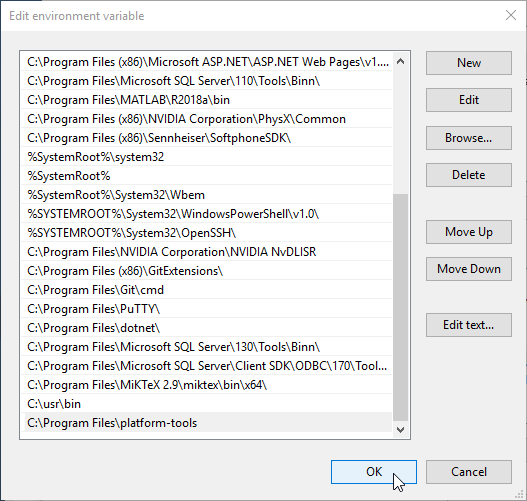
Check that C:\Program Files\platform-tools is not already in the list.
If the list already contains this line then the $PATH is already well configured.
Otherwise (regular case for a new installation), click on New or just bellow the last line :
And copy paste the folder location C:\Program Files\platform-tools where binaries are located :
Please feel free to use the forum if you have a question or want to give your feedback on this hands-on !